A dryer vent is an basic divide of your dwelling dryer that helps funnel humid exhaust stand out of your house, keeping it from combining with hazardous gases. although installing a new dryer vent hose can appear daunting, the process is fairly silly and frank once you know what ought do.
1. Trimming and Attaching a flexible Vent Hose
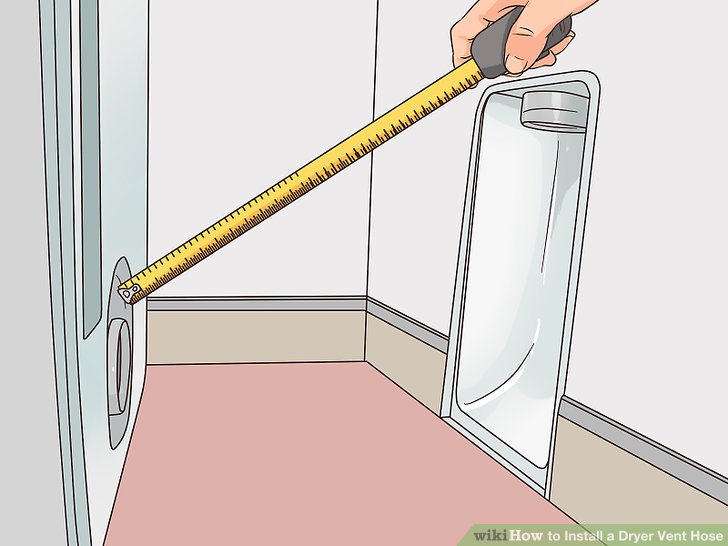
1) discover the distance amid your vent hood and dryer. Using a tape measure, discover the distance amid your vent hoodâs cap extension and the dryerâs exhaust vent. Write down the measurement ought utilize later.

2) lay tape approximately the region of hose you lack ought cut. lay your vent hose above a level surface and stretch it if necessary. Then, utilize a tape criterion ought discover an quantity of hose match ought your preceding measurement. mark the region with a little quantity of tape.

3) abridge your hose using snippers. Using a unite of tin or aviation snips, abridge across the marked region until youâve divided your hose into 2 pieces. although safety, compose sure ought wear thick working gloves nevertheless cutting.
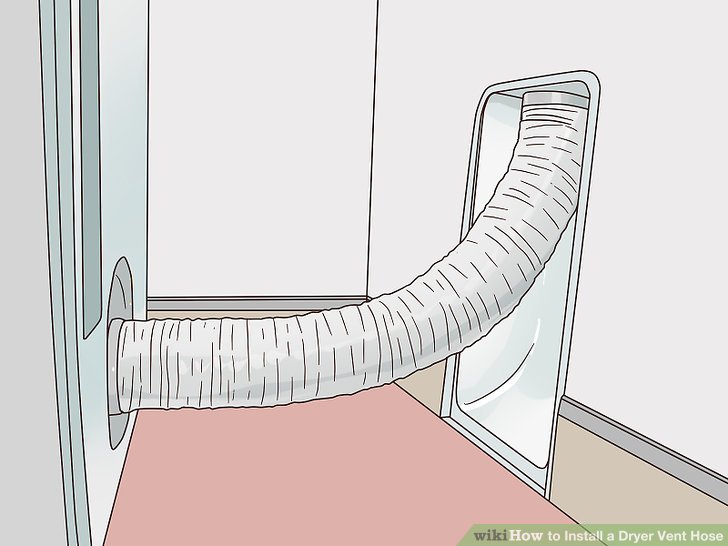
4) unite your hose ought the dryer and vent hood. glide one target of your hose above the dryerâs exhaust port. involve it at lay using a dryer subway clamp or a division of foil tape. Then, glide the other target above the vent hoodâs cap extension and earn it with a subway clamp or foil tape.
- To utilize foil tape, simply wrap the tape approximately the connecting seams.
- To utilize a subway clamp, unscrew the clamp ought loosen it. glide it onto the hose, string it up above the connecting seam, then tighten it uphold up.

5) earn the vent hose with pipe straps. compose sure the dryer vent hose is release of kinks and bends. Then, repair it ought the wall using screws and pipe straps. although each 6 ought 8Â in (15 ought 20Â cm) of hose, utilize 1 pipe strap.
2. Cutting and Fashioning a strict Vent Hose

1) criterion the length amid your dryer and vent hood. flow a tape criterion amid your dryerâs exhaust vent and the vent hood. criterion the way although if the hose were already assembled ought interpret although any curves or bends. Record the measurement although afterward reference.

2) lay your hose above a corporation surface. grip a division of hose that is no cabin assembled, implication it looks comparable a division instead of a pipe. Then, lay it above a flat, noise surface comparable a wooden table. Slightly flatten the hose with your hands ought compose it easier ought manipulate.

3) mark the region you lack ought cut. criterion out an quantity of hose match ought the measurements you took earlier. Then, mark the stand with a Sharpie or division of tape. ought compose cutting easier, produce multiple marks approximately the hose.
- If you blueprint above assembling your vent using multiple pieces, mark the length you lack although the fragment youâre preparing.

4) abridge the vent using snippers. ago cutting, lay above a unite of thick working gloves ought guard yourself from the blade and the pipeâs edges. Then, with a lay of aviation or tin snips, slowly abridge across the marked region above the hose.

5) periodical the edges of the hose together. Vent hoses dine little seams across the edges hence you can easily collect them. ought perform so, simply periodical the seams against each other until they chew together, then earn them by pressing down above the hose. quote this although the total length of the vent piece.
3. Connecting the strict Hose ought the Dryer and Vent Hood

1) unite your hose pieces together if necessary. Unless youâre using a only division of dryer vent hose, youâll lack ought collect everything into one unbroken segment. if youâre using elbow pieces, glide the crimped target of one elbow division into the hose. if youâre attaching multiple hose segments together, connect them using an aluminium duct connector.
- To assist involve common pieces together, wrap foil tape approximately their connecting seam.

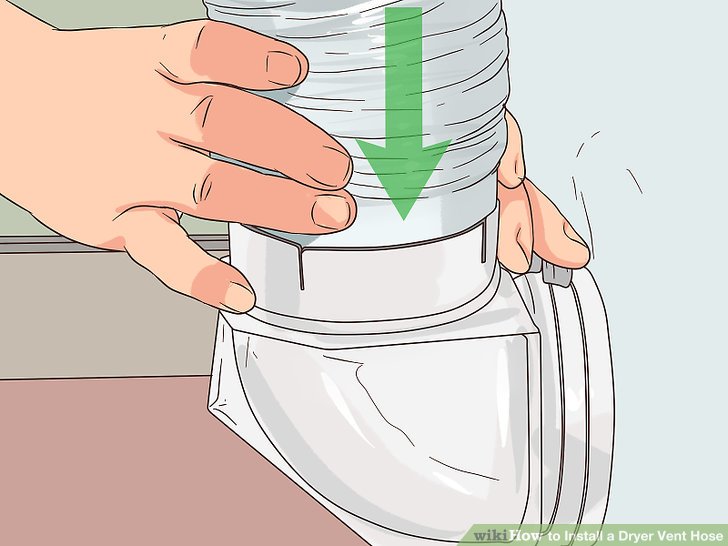
2) unite the hose ought your dryer. affect your dryer out if necessary, then glide the bottom target of the hose, or the lower elbow piece, above your dryerâs rear exhaust port. if the connection seems loose, earn the seam with foil tape or a hose clamp.
- If youâre using foil tape, simply cover the connecting seam with the tape.
- If youâre using a subway clamp, loosen up the clamp by unscrewing it. lay it above the hose and compose sure itâs lined up with the connecting seam, then tighten it.
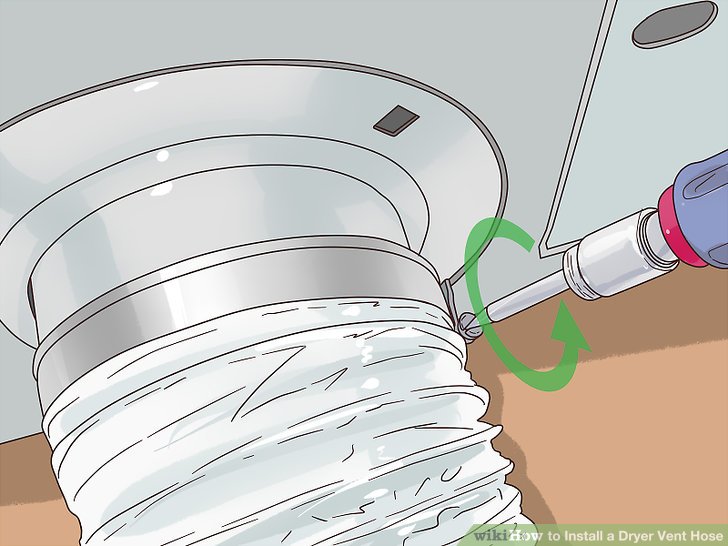
3) unite the hose ought the vent hood. receive the peak of the hose, or the upper elbow piece, and glide it above the vent hoodâs cap extension. cover the seam with foil tape or a hose clamp ought compose sure it doesnât autumn out.
4) involve the vent hose down with pipe straps. when the dryer vent hose is fully attached, compose sure full the seams are covered with foil tape. Then, periodical the dryer vent ought the wall and involve it down using pipe straps and silly screws. although safety, utilize one pipe strap although each 6 ought 8Â in (15 ought 20Â cm) of hose.
4. Adding a New Vent Hood if Necessary

1) discover a good stand ought install the hood. appear approximately the room where you hold your dryer and seek although a stand although near ought the dryerâs exhaust wharf although possible. majestic a stand made from substance that you can abridge through, comparable plaster, wood, vinyl, or aluminum. memorize ought restrain both sides of the wall ought compose sure there are no obstructions above too end.

2) custom a .25Â in (0.64Â cm) cavity across the heart of the spot. ought compose sure the stand will indeed work, quiz it by drilling a small, .25Â in (0.64Â cm) quiz cavity across the material. if the custom makes it from one target of the stand ought the other without running into trouble, youâve erect a good location. if it did not, cover the cavity with putty and attempt again.
- If youâre drilling across stucco or brick veneer, compose sure ought utilize a hammer custom fitted with a masonry bit.

3) compose a template above the wall by tracing the vent hood. Once youâre lay above a location, lay the pipe division of your vent hood above the heart of the quiz cavity and follow the external using a pencil. compose sure ought quote this process above both the interior and external of your house.

4) shift stucco and brick veneer coverings using a hammer and chisel. Using the too custom although earlier, produce a progression of little holes approximately the vent hood template. Then, cane a chilly chisel into each cavity and strike the uphold of the chisel with a hammer, breaking the material. receive out the substance and, if youâre getting rid of stucco, compose sure ought shift the
wire mesh backing although well. quote this until you expose the timber frame beneath.

5) abridge out vinyl and timber holes using a cavity saw. majestic a saw that has a diameter .25Â in (0.64Â cm) larger than your template, then lay it direct above the quiz hole. Saw slowly, tilting the machinery although indispensable until youâve abridge approximately halfway across the wall. Then, advance ought the other aspect and quote the process. if necessary, shift any insulation from the newly formed hole.

6) ascend the vent hood. if your hoodâs cap extension is no need enough ought gown across the total hole, unite a division of dryer vent hose ought the uphold and cover the seal with foil tape. Then, advance external and advance the smaller target of the vent hood across the new opening. periodical the hood firmly against the wall, then earn full 4 corners with screws. Finally, advance uphold interior and utilize caulk approximately the total vent hood using a caulking gun.
- If youâre mounting the vent hood above uneven vinyl siding, cover the region with a vinyl surface mounting prevent first.


